Garage door repair
Garage Door Safety Sensors: How They Work and When to Call a Technician
Garage door safety sensors sit low near the opening, but they control a high-consequence decision: whether an automatic door should keep closing. When the beam is blocked, a sensor is bumped, wiring is damaged, or the opener cannot confirm the protective system, the door may reverse or refuse a remote close command. This guide explains the system in plain language and shows where safe homeowner observation ends and technician diagnosis begins.
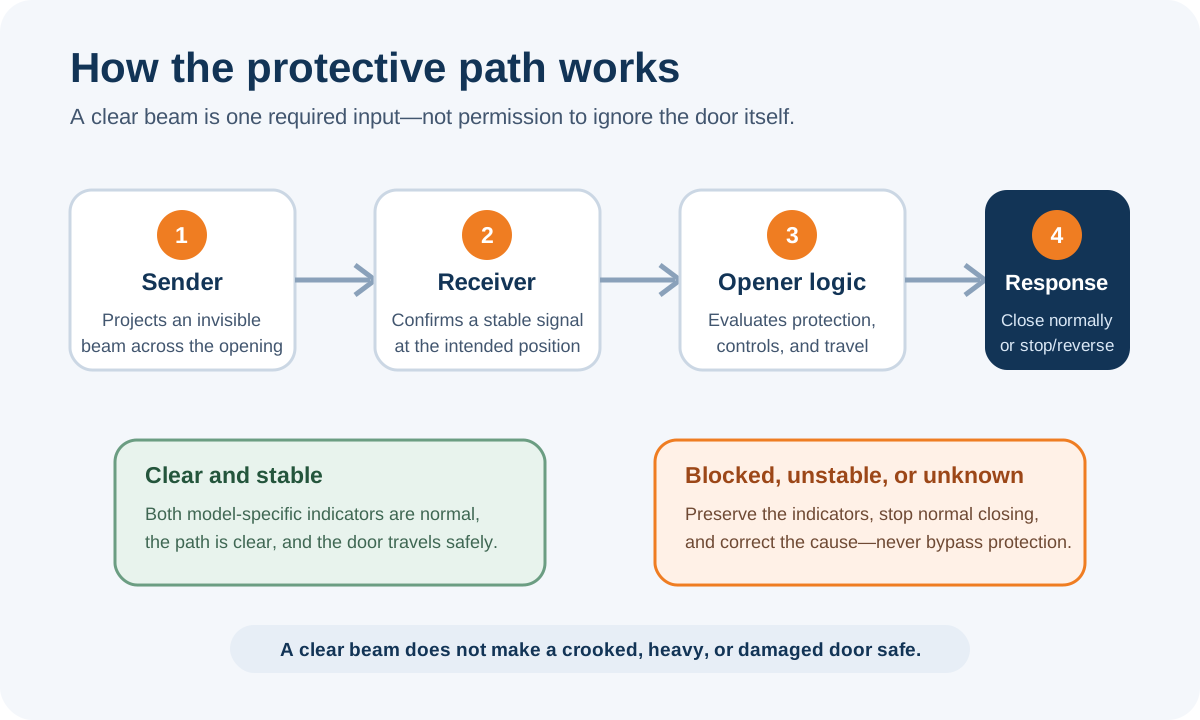
Garage door photo eyes normally work as a matched pair across the opening. One side sends an invisible beam and the other receives it; if the beam is interrupted or the system loses a reliable signal during a close request, the opener should prevent or reverse downward travel according to its design. Homeowners can clear ordinary objects, gently clean exposed lenses as the manual directs, observe both indicator lights, and document visible bracket or wire damage from the floor. Do not bypass, relocate, rewire, or force the sensors, and stop if the door itself is crooked, heavy, off track, or otherwise unsafe.
Garage door safety sensors sit low near the opening, but they control a high-consequence decision: whether an automatic door should keep closing. When the beam is blocked, a sensor is bumped, wiring is damaged, or the opener cannot confirm the protective system, the door may reverse or refuse a remote close command. This guide explains the system in plain language and shows where safe homeowner observation ends and technician diagnosis begins. Continue with the complete library of garage door repair guides when you want to compare related decisions.
Key takeaways
- Safety sensors are a protective system, not an optional convenience to defeat when the door will not close.
- A steady, dark, blinking, or mismatched indicator means only what the exact opener manual says it means.
- Safe checks include clearing the beam path, gentle lens cleaning, and visual documentation from the floor.
- Loose brackets, damaged wire, recurring misalignment, or failed protective tests call for proper diagnosis.
- Sensor trouble and door trouble can exist together, so the complete opening still needs attention.
Understand what the photo eyes actually do
Most modern residential automatic openers use a pair of low-mounted photoelectric devices near the door opening. One unit sends an invisible beam across the threshold and the other watches for that signal.
If a person, pet, vehicle, storage bin, broom, leaf, or other object interrupts the beam during a close request, the opener's protective logic should prevent or reverse downward travel according to the product design. The sensors do not see the entire garage; they monitor one defined line near the floor. If this condition matches your situation, review the service scope for garage door repair.
This beam is one part of the operator's entrapment-protection system, not a complete substitute for watching the door. CPSC guidance on automatic residential garage door operators explains that these products are subject to a mandatory federal safety standard. The practical takeaway for a homeowner is simple: a door that refuses to close because the protective system cannot confirm a clear path is providing safety information, not merely creating an inconvenience.
The system still depends on the opener, wiring, brackets, mounting position, electrical power, door condition, and programmed behavior. A clear beam cannot make a crooked or binding door safe, and an aligned pair cannot correct a broken spring, displaced cable, damaged track, or failing operator. Treat sensor behavior as one diagnostic path within the complete garage door system rather than proof that every other component is sound.
Projects the beam
One device provides the invisible signal across the opening and may use a model-specific indicator color.
Confirms the path
The paired device must receive a stable signal in the expected position for normal protected closing.
Makes the travel decision
The opener interprets the protective input together with its controls, travel, force, and internal diagnostics.
Read the symptom before touching the sensors
Begin with one complete description of what happens. Note whether the door opens normally, whether it starts down before reversing, whether it refuses downward movement altogether, and which control was used.
Record any opener-light flashes, wall-control messages, warning tones, relay clicks, or sensor-light changes. A remote that opens the door but cannot complete a close request may still be transmitting correctly; the protective system may be refusing that direction of travel. If this condition matches your situation, review the service scope for garage door opener repair.
Compare the wired wall control with one authorized remote from a safe position, but do not repeatedly cycle the door. Some systems have a model-specific constant-pressure behavior at the wall control when a photo-eye fault exists.
That behavior is a diagnostic clue and temporary control mode, not permission to resume normal remote operation or hold the button with an object. Use the manual to interpret it and keep the opening supervised.
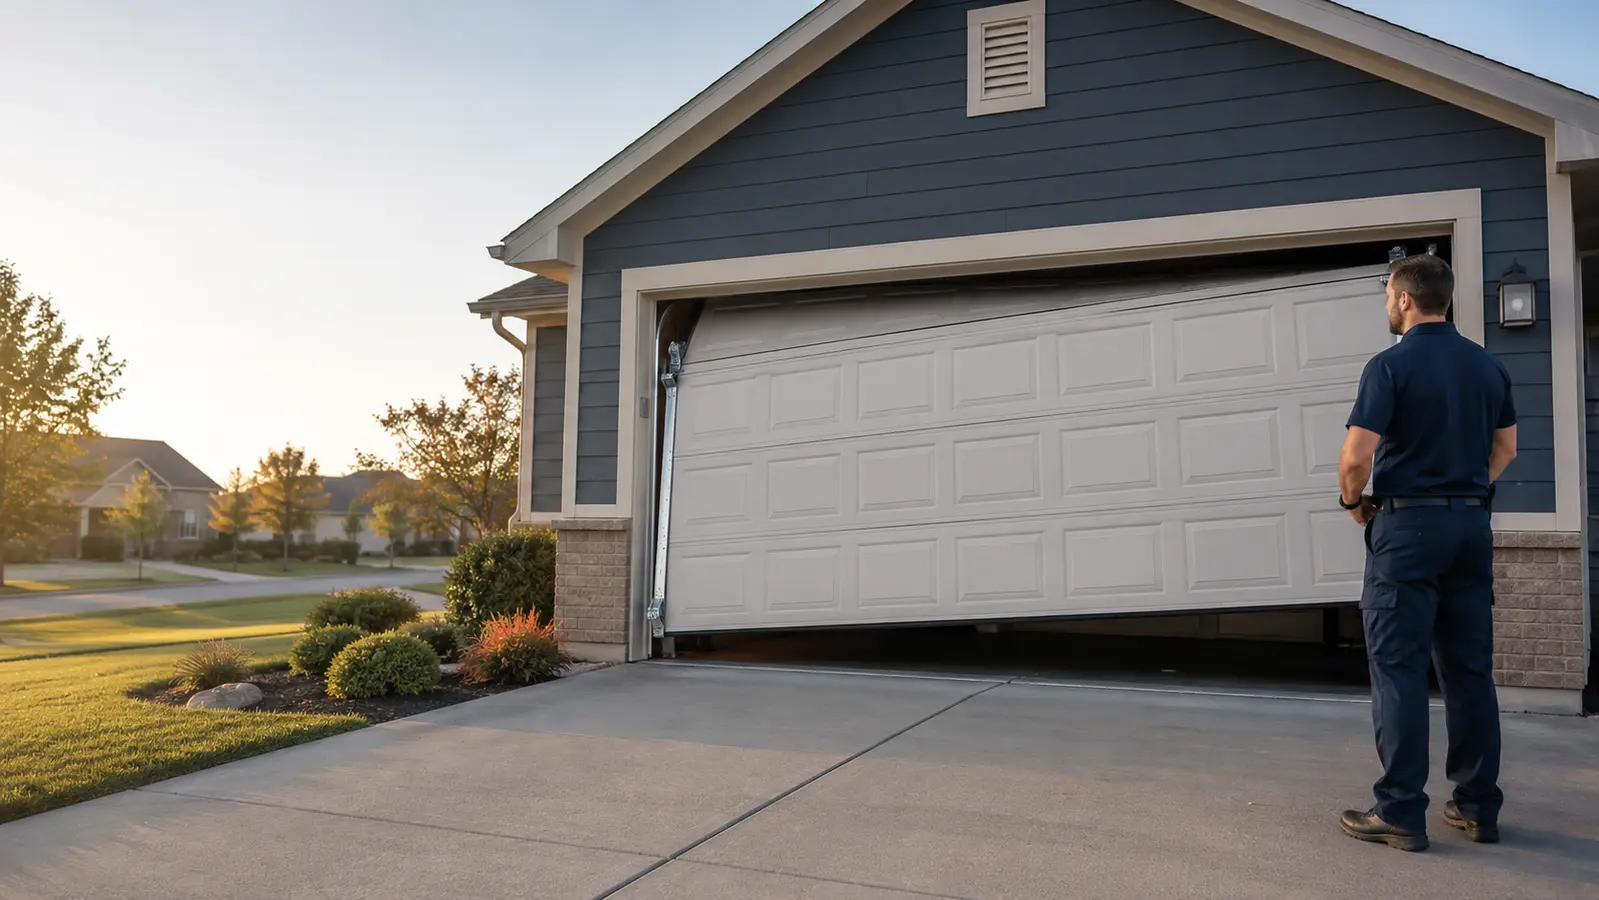
If every control causes the same crooked, jerky, noisy, partial, or strained movement, stop treating the issue as a sensor-only problem. Look from outside the travel path for a displaced roller, bent track, loose-looking cable, damaged section, folded seal, or obvious obstruction.
Do not reach into the tracks or stand beneath a suspended door. Door-system movement faults require stabilization and diagnosis before sensor adjustments or further automatic testing.
| Observed pattern | Useful observation | Do not assume |
|---|---|---|
| Door opens but will not close remotely | Beam path, both indicators, opener diagnostics | The remote has failed |
| Door starts down and reverses | Exact reversal point, obstruction, sensor-light change | More closing force is needed |
| One sensor indicator is dark | Power, visible wire condition, model meaning | The lens only needs cleaning |
| Indicator flickers when bracket moves | Loose mount, vibration, recurring alignment loss | Holding it by hand is a repair |
| Every control produces abnormal door travel | Door level, sound, tracks, rollers, springs, cables | Photo eyes are the only fault |
Clear the beam path without creating another hazard
With the door stable and no one operating it, remove ordinary loose objects from the opening and nearby floor. Look for storage bins, garden tools, bicycles, toys, cords, leaves, cobwebs, mud, or a vehicle part crossing the sensor line.
Check both sides because a narrow object close to one lens can be easy to miss from the other side. Keep children and pets away while the opening is being assessed. If this condition matches your situation, review the service scope for garage door opener installation.
Do not move the sensors higher to clear stored items, aim them around an obstacle, tape them together, or place them facing each other on a shelf. Their mounting height, bracket orientation, wiring, and line across the door path are part of the protective design. Repositioning the pair to make a crowded garage close normally defeats the purpose of monitoring the threshold and can conceal a hazardous storage pattern.
After clearing the area, observe the indicators before requesting one controlled close cycle. If an indicator remains dark or blinking, preserve that evidence instead of nudging the bracket until the light happens to change.
Take a wide photo that shows both sensor locations and the clear opening, plus a closer photo of each indicator from a safe angle. A technician can use the pattern, mounting condition, and model information more effectively than a report that the lights looked “weird.”
Clean exposed lenses gently and only as directed
Dust, spider webs, grass clippings, moisture film, and garage residue can interfere with the optical path. If the sensors are safely reachable from the floor and the manual permits homeowner cleaning, use a soft dry cloth to wipe only the exposed lens surface and housing.
Avoid solvents, lubricants, abrasive pads, compressed air at close range, or water spray. Do not remove covers or separate sealed parts.
Cleaning should not require twisting the bracket, pulling the wire, loosening a fastener, or placing a hand into the track. A lens that is cracked, clouded internally, wet inside the housing, or physically displaced is not restored by polishing the outside. Likewise, recurring condensation may point to moisture exposure, seal failure, or placement conditions that deserve correction rather than repeated wiping.
When the lens is clean, compare the indicator pattern again without assuming that illumination proves alignment. Some devices show power on one side and signal quality on the other; others use different colors or flash codes.
Follow the exact product manual. If the light remains unstable, record whether it changes with vibration, sunlight, door movement, or gentle nearby footsteps without touching the device during operation.
- Work only from the floor with the door stable and controls out of use.
- Use a soft dry cloth when the manufacturer allows homeowner lens cleaning.
- Keep solvents, sprays, oils, abrasives, and high-pressure air away from the sensors.
- Do not open housings, pull wires, bend brackets, or reach into the track.
- Document cracked lenses, internal moisture, corrosion, or recurring contamination for service.
Interpret indicator lights through the exact model manual
Indicator lights are useful only when matched to the correct opener and sensor family. A steady green light, steady amber light, blinking red light, or dark indicator can mean power, alignment, signal loss, obstruction, wiring fault, or a product-specific diagnostic state.
Genie's Safe-T-Beam product support information (opens in a new tab), for example, describes expected indicator behavior for that system. Another manufacturer or generation can use a different color and code sequence.
Identify the opener model, sensor model or part label, and approximate installation date before following a chart. Photograph both indicators at the same moment because one side may show normal power while the other reports a weak or interrupted beam.
Also capture the opener's diagnostic light or wall-control message. Avoid translating one brand's blink count to another system that happens to look similar.
A light that changes when the bracket is barely touched, when the door vibrates, or when temperature changes may reveal a loose mount, damaged conductor, failing device, or marginal alignment. Do not wedge the bracket with cardboard, tape the sensor in position, or twist wires together. A temporary steady light achieved by holding hardware does not prove the system will remain reliable during normal door operation.
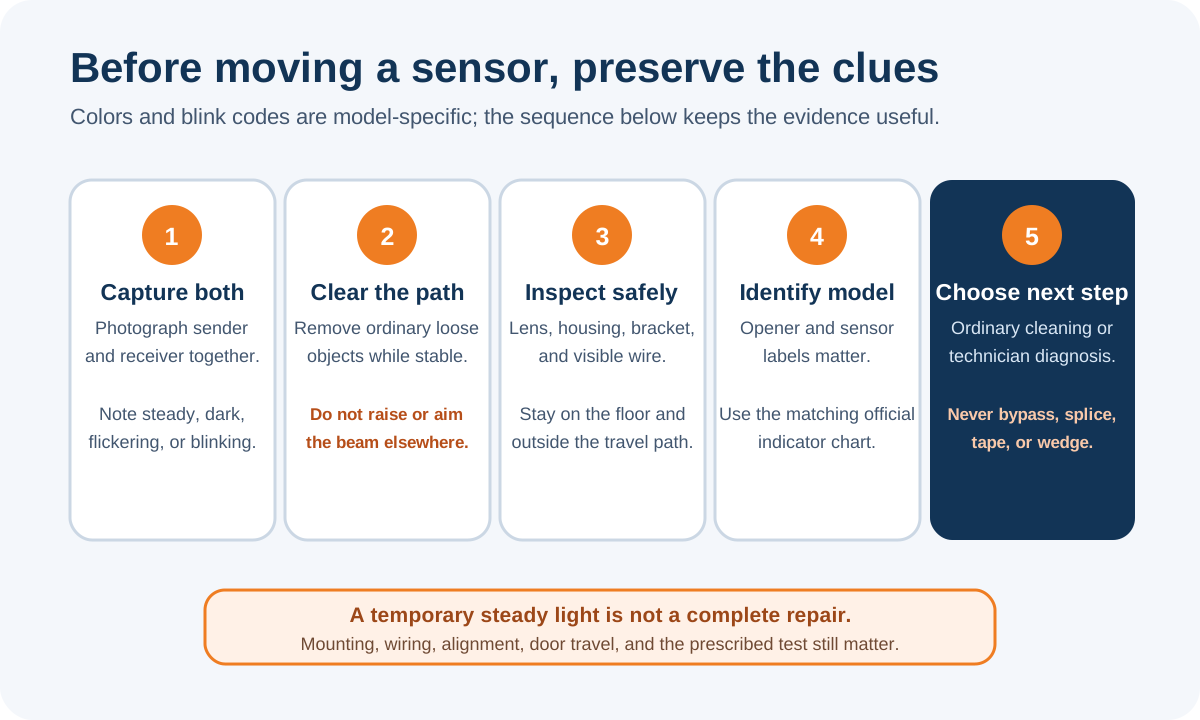
Find the exact model
Use the opener and sensor labels so the colors, flash codes, and tests come from the correct instructions.
Photograph both sides
Power and receiving indicators may tell different parts of the same story when captured together.
Do not erase the clue
Record flicker, vibration, sunlight, and timing before moving brackets or disconnecting wiring.
Treat alignment, mounting, and wiring as a connected problem
A sensor pair can lose a stable line when a track is bumped, a bracket loosens, stored equipment presses against the mount, the floor shifts, or vibration gradually changes the angle. From a safe position, compare the height and direction of both housings and look for a visibly bent bracket or missing fastener. Do not loosen the track hardware, because the sensor bracket may share space with structural or moving components that should not be disturbed casually.
Follow the visible low-voltage wire without pulling it. Look for cuts, crushed insulation, pet damage, corrosion, loose staples, exposed copper, pinched sections, water exposure, or a conductor pulled from the sensor.
Do not splice unknown wiring, substitute household cable, bypass a connector, or place a jumper across terminals. Wiring symptoms can resemble alignment problems, and an improvised repair can create intermittent protection that appears normal until the door is moving.
When brackets or wiring need repair, the closeout must include more than a steady indicator. The technician should secure the mount, restore the correct wiring path and connection, confirm the beam across the intended opening, and run the manufacturer-prescribed protective tests. If the track itself is moving or the door vibrates enough to disturb alignment, the underlying mechanical condition also needs correction.
| Visible condition | Safe homeowner action | Technician scope |
|---|---|---|
| Ordinary loose object in beam | Remove it while door is stable | None if full prescribed test passes |
| Dust or web on exposed lens | Gently clean per manual | Inspect if fault returns or test fails |
| Bent or loose bracket | Photograph; do not improvise support | Secure, align, and verify under operation |
| Cut, crushed, corroded, or pulled wire | Keep controls out of use | Trace and restore approved wiring |
| Track movement or strong vibration | Stop repeated cycling | Diagnose door hardware and sensor mounting together |
Account for sunlight, moisture, and intermittent faults
A sensor problem that appears only at a particular time of day may involve direct sunlight at the receiving lens, shadows from a moving object, reflective surfaces, moisture, or temperature-sensitive wiring. Record the time, weather, door position, and which indicator changed. Do not build a permanent shade that blocks the opening, relocate the sensor without product instructions, or assume every sunny-day failure is caused by light rather than a marginal mount or damaged device.
Intermittent problems deserve careful evidence because a successful second press does not prove protection is reliable. Note whether the fault follows rain, washing the garage floor, cold mornings, vehicle exhaust, lawn work, or vibration from the door.
Capture a short video from a safe position showing both the indicator and opener response if that can be done without standing in the path. Do not deliberately obstruct the beam with a person, hand, or pet.
A technician can evaluate signal stability, mounting geometry, wire continuity, environmental exposure, device compatibility, and the opener's diagnostic history. Replacement parts must match the operator and be installed at the intended height and orientation. If the opener is obsolete, lacks support, or cannot accept a compliant compatible protective system, replacement planning may be safer and more practical than piecing together unrelated sensors.
Know when to stop and call a technician
Call for service when the beam path is clear and clean but the indicators remain abnormal, the fault returns repeatedly, a bracket will not stay aligned, wire or housing damage is visible, or the manufacturer's protective test does not pass. Also call when the opener will close only through a special constant-pressure wall-control behavior, when one or both sensors have no reliable power, or when replacement compatibility is uncertain. Do not keep using a protective system that cannot demonstrate normal function.
Stop immediately for conditions beyond the sensor path: a crooked or unsupported door, a roller outside the track, a loose or displaced cable, a broken spring, a section bowing sharply, a rail flexing, or a motor straining against a door that will not move freely. Do not pull the emergency release on a questionable raised door, increase closing force, alter travel limits, or use the opener to overcome mechanical resistance. These are complete door-system risks.
Heartland's garage door repair service can coordinate diagnosis of the opening, photo eyes, wiring, opener, and door movement together. When the fault is isolated to the operator or control system, the garage door opener repair page describes the focused service path. If the existing unit is obsolete, incompatible, or unable to support reliable protective operation after the door is confirmed sound, the garage door opener installation page explains replacement planning.
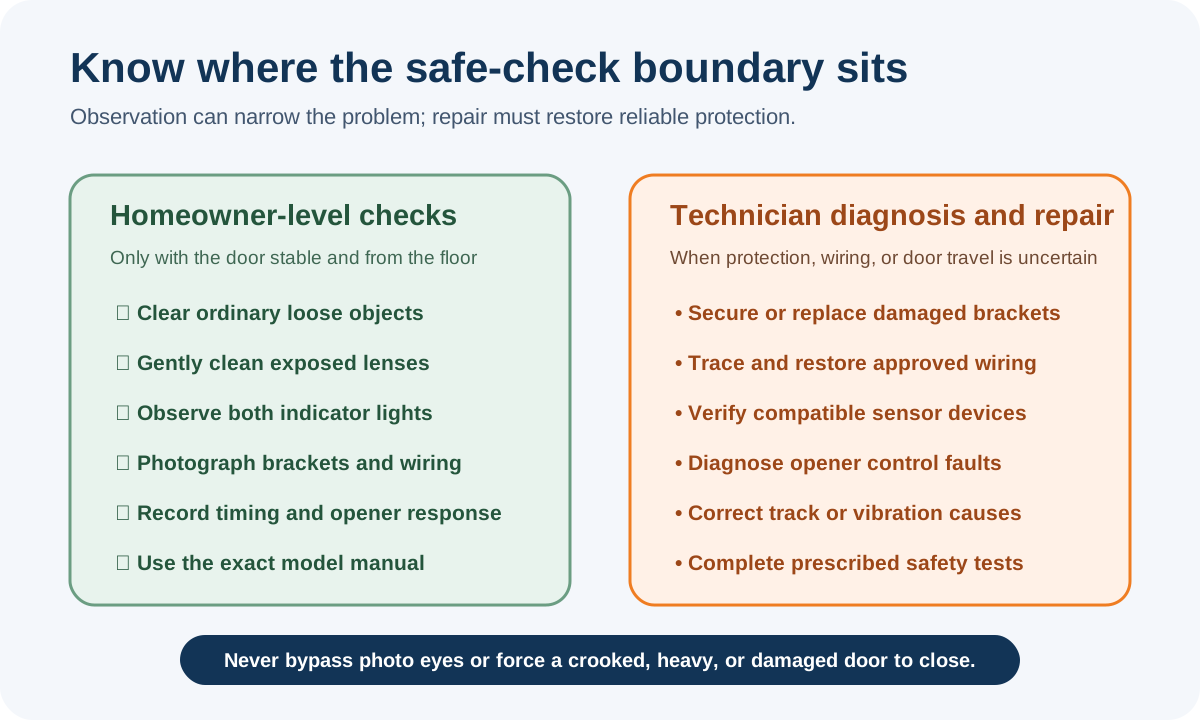
- The clear beam still produces abnormal indicators or failed closing behavior.
- A bracket, housing, connector, or visible wire is damaged or unstable.
- The problem returns after ordinary cleaning and obstruction removal.
- The opener's prescribed protective test fails or cannot be completed safely.
- The door is crooked, heavy, off track, unusually noisy, or affected by spring or cable trouble.
Prepare evidence and verify the completed repair
Before requesting service, record the opener brand and model, sensor labels, approximate age, door position, control used, closing response, opener-light pattern, wall-control message, and both sensor indicators. Include the time of day, weather, and any recent impact, cleaning, power outage, electrical work, lighting change, storage move, pest damage, water exposure, or prior repair. Take wide photos of the complete opening and close photos of each sensor without losing location context.
Tell the technician whether the door can open normally, whether it starts downward, where it reverses, and whether constant-pressure operation changes the response. Mention any visible track movement, wire damage, loose bracket, cracked housing, or moisture. This fact set helps distinguish an ordinary obstruction from alignment, wiring, device, receiver, operator, or door-system work and reduces the chance of replacing a sensor pair without finding the cause.
After repair, watch a controlled demonstration from a safe location. The closeout should confirm stable indicators, secure mounts, protected wiring, normal operation from authorized controls, smooth door travel, correct limits, and the manufacturer's specified photo-eye and reversal tests.
Keep the model information, service notes, and any updated instructions. If an intermittent symptom cannot be reproduced, agree on what evidence to capture next rather than closing the issue after one good cycle.
Document the pattern
Models, indicators, controls, timing, recent changes, and wide photos create a reproducible service request.
Diagnose the complete opening
Sensor function, wiring, operator logic, door travel, and mechanical condition should be evaluated together.
Prove protective operation
Secure hardware and normal travel are not enough; complete the prescribed beam and reversal checks.
Frequently asked questions
Questions readers ask
Why is one garage door sensor light blinking?
Depending on the exact model, blinking can indicate obstruction, weak alignment, wiring trouble, lost signal, or another diagnostic condition. Identify the opener and sensor model and use its official indicator chart rather than applying another brand's meaning.
Can I close the garage door if the safety sensors are not working?
Do not bypass or defeat the sensors for normal use. Some systems have a model-specific constant-pressure wall-control behavior, but that is a diagnostic or controlled behavior, not restored protection. Keep the opening supervised and arrange repair.
How do I clean garage door safety sensors?
When safely reachable from the floor and permitted by the manual, gently wipe the exposed lens and housing with a soft dry cloth. Do not use solvents, sprays, abrasives, lubricants, or water, and do not open the housing.
Can sunlight interfere with garage door photo eyes?
Direct sunlight can affect some systems, but time-of-day trouble may also reveal marginal alignment, mounting, wiring, or device condition. Record the timing and indicators and have recurring faults diagnosed instead of relocating the sensors casually.
Is it safe to align garage door sensors myself?
You can observe the housings and follow a clearly documented homeowner procedure for your exact model when safely reachable. Stop if alignment requires loosening track hardware, handling damaged wiring, bending brackets, or working around an unstable door.
When should a garage door technician replace the sensors?
Replacement may be appropriate for cracked or moisture-damaged housings, failed electronics, incompatible devices, persistent signal loss, or irreparable wiring and mounting problems. The technician should verify compatibility and complete the manufacturer's protective tests after installation.
The right solution depends on the specific lock, door, vehicle or garage door system. Check the Wichita-area service pages, then call or send the details for an evaluation.